Showing posts with label recipe. Show all posts

Monday, August 27, 2012

Oatmeal Raisin Pecan Cookies!


I don't always make sugar cookies.
I make other kinds too....really I do!

I shared this recipe in a guest post over at Itsy Bitsy Paper Blog last week!


I'd thought I'd share it here too.....enjoy!


Lizy B's Favorite Cookies in the Whole Wide World!


This recipe came about in a silly sort of way.  
When my family and I travel anywhere with friends, I always bring cookies
 (if you've ever stopped by my blog this won't surprise you too much).  

One particular trip, I sent out the email I always send...

"I'm turning on the oven today to bake cookies for our trip...any requests?"

I usually hear...'Chocolate chip'....'Peanut Butter'....'anything with some sugar in it...'

but this day, Miss Christy replied...


"How about......Oatmeal Raisin Pecan?!"


And that was that.

These are now the cookie that I can't ever bake for myself.

Know why?


Because I will eat them ALL!!!!!!!!!

(that's not a joke people....it has happened...more than once)


Oatmeal Raisin Pecan Cookies


1 1/2 cups A.P. flour
1 1/2 tsp salt
1/2 tsp baking powder
1/2 lb. unsalted butter (room temp)
1 cup lt. brown sugar - packed
1 cup granulated sugar
2 large eggs (room temp)
3 cups rolled oats
1 1/2 cups raisins
1 cup pecans-broken or coarsely chopped

preheat oven to 350-makes approximately 32 cookies

Whisk together flour, salt and baking powder in a mixing bowl and set aside.
In the bowl of a stand mixer, beat butter until creamy.  Add sugars and beat until fluffy, approx 3 min.  Beat in eggs, one at a time.  Incorporate dry ingredients using your mixer's lowest setting.  Then add oats, raisins and pecans.  (You can chop your pecans if you like. I measure out one cup of pecan halves, scoop a few into my hand at a time, and crack them as I drop them into the bowl)  Scoop out onto parchment or silpat lined baking sheets.  Bake 14-16 minutes.  They are done when the edges just start to turn brown, the rest of the cookie will look underdone.  

(If you eat one right away...the center will still be gooey.)  


Here's the best part....there's oatmeal, pecans and raisins....remind you of anything?

That sounds like breakfast to me!

(I think even Dr. Oz would approve of the whole grains, don't you?)


Thanks for having me over to your blog Lindy!

(If you click over to the original post, she created a printable version!)


Thanks for stopping by,

Lizy B

Sunday, March 25, 2012

Royal Icing Recipe, Step-by-Step!

Lately, I've been getting a lot of emails asking about my cookie icing.


I always use Royal Icing for my cookies,

 and although there are many resources out there to help, 

I thought it was about time I put together my own post for you all!


This is the recipe I use.


Yes....I did write the recipe directly onto the top of the container I keep 
the meringue powder in, with a permanent marker.


It's one less thing I have to remember.


ROYAL ICING


6 TBSP Meringue Powder

11-12 TBSP Water (3/4 of a cup)

2-3 tsp flavoring (vanilla, almond....whatever floats your boat)

1 TBSP light corn syrup


  Just so we're clear....I did not make up this recipe, 
I have no idea who did, or I would happily give them credit.
It's very close to the Wilton recipe.

There is a recipe out there called Antonia74,  
I've never actually looked it up, but it could be the same too.


This just happens to be how I put it together!

Here we go!


CK products happens to be the meringue powder I prefer.


Wilton also sells meringue powder that is easy to find at

Michaels, JoAnn's, Wal-Mart etc.


I measure out 3/4 cup of water in a glass measuring cup.  


If the air is very dry, like 'your hair keeps flying up with static electricity' dry, 

I'll add another tablespoon of water.


If its damp or foggy or about to rain, I take away a tablespoon.

Highly scientific...I know.


I stir up the meringue powder a bit with a little bitty whisk,

then measure out 6 TBSPS and dump it into the water.


Whisk it up until its frothy and all the powder has dissolved.

Then....I wait.


I answer a few emails, read a blog or two, 
watch the housewives of who-knows-where
wash the dishes, fold the laundry.


Next, I pour a two pound bag of powdered sugar into the 
bowl of my stand mixer.

Stir it around a bit with a whisk.

If you're feeling super industrious you could sift it.

I'm not usually in that kind of mood.


By now the meringue powder has been sitting 

for about 10 minutes or so.


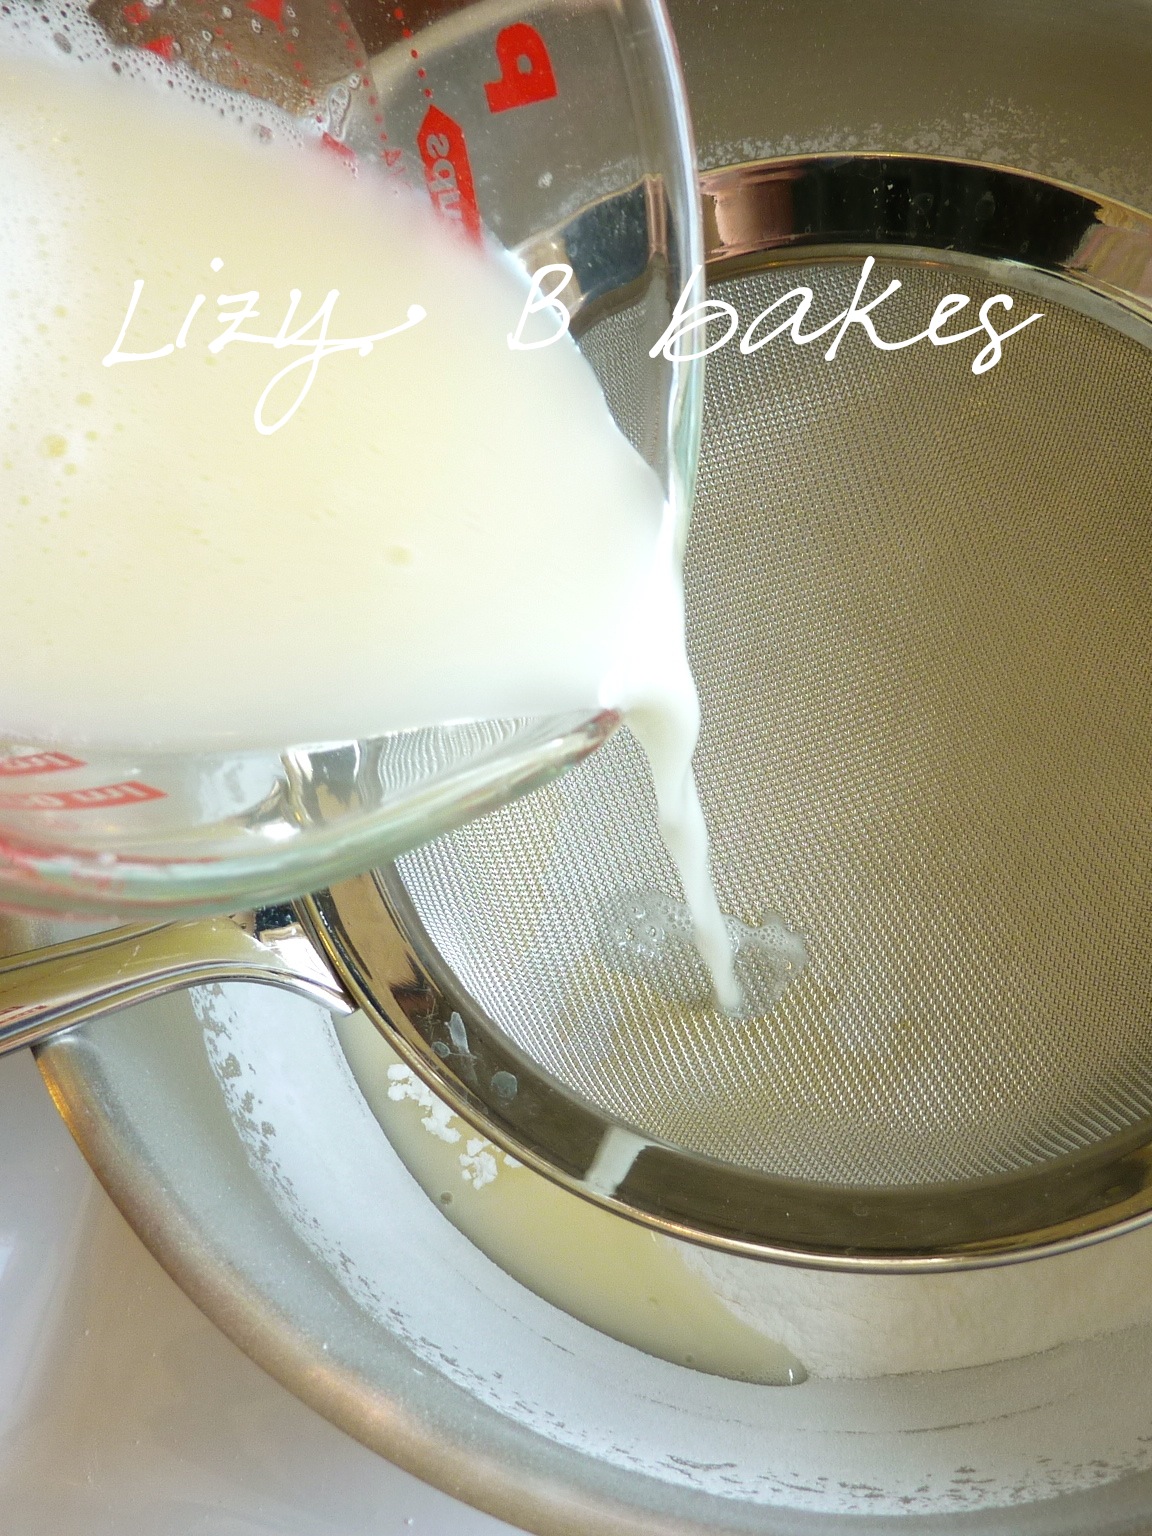
One more quick stir with the whisk and it goes through

a fine mesh strainer into the sugar.


Right before mixing I add the corn syrup and flavoring.


The corn syrup adds a little bit of shine and cuts down on the 
'tooth-breaking' hardness of the icing when its dry.

The flavoring adds......well, flavor.


That's everything!

No secret ingredients!


I do have a favorite secret tool though.

I love my beater blade.

The silicone edges mean I don't have to EVER 

scrape down the sides of the bowl


EVER!!!!!


They have no idea who I am, nor did they give me anything for saying this.

I just really love mine...


So, the only thing left is to turn on the mixer!!!


After a couple of seconds on 'stir' to make sure all the sugar is wet,
I turn it to 3 and leave it on for about 5 minutes.

In some kitchens, it takes 3 minutes, some others, as many as 10.

Mostly, I've found, its important to be patient and not turn the mixer up too high.
Your icing can become gritty and have many, many air bubbles.


Air bubbles are bad for smooth cookie icing.

Keep checking and turn it off as soon as you get a peak.


Can you see those two peaks up there?

One is pointy and sticking up, the other is pointy but flopped over.

Just how I like it!!

One reader asked me if my icing was 'creamy'.

I wasn't sure at first, but I actually think that's a pretty good description.

Creamy and smooth, but still stiff.


From here its ready to be colored, wrapped and slipped into piping bags...


...or thinned down to flooding consistency and poured into squeeze bottles.


The other big question is usually 

"How do you store your icing?"


I really like these 20 oz disposable

 (but I use them over and over) ziploc containers.


They have an air tight seal and I can fit one batch of icing

into two containers perfectly!


I love that I can use half immediately and pop the other into the fridge!


One last tip.....

This stuff dries like concrete.

Be sure to leave the beater in your mixing bowl,

give it a couple of squirts of dish soap,

 and fill in to the top with hot water.


Nothing is more miserable to clean than a bowl of rock hard icing.

Except maybe decorating tips filled with rock hard icing.

Ick.


Thanks for stopping by,

Lizy B

  PSST!......Don't forget to enter the giveaway!!!!

Giveaway closed....congrats Brooksley!

Monday, March 5, 2012

Peanut Buttery 'Cut-Out' Sugar Cookies!


I've been keeping something from you all....

It's just that, I don't want anyone to judge....

but....

I have to be honest....finally.

My husband won't eat my sugar cookies.

(sigh)


We are....a house divided.

Some of us like sugar cookies.  
Some don't. 
(although I've heard rumors that Mr. Man has never tried one, 
I know that can't possibly be true.)

Some of us like peanut butter cookies.  
Some wish they could eat them but if she they did, 
they would have a migraine for a month and have to stay in bed under the covers.

Not good.

For many years there has been a stand-off.

If I bake sugar cookies, the husband starves.

If I bake peanut butter cookies, I can't eat any and I'm really bitter and grumpy.


I'm sure you can appreciate the traumatic nature of the situation.


So I did something I've never done before...

never, ever....


I MADE UP A RECIPE!!!!!!


I did!
Wanna see?!


Peanut Buttery Sugar Cookies
(The cut out kind!)


2 1/2 cups flour
1/2 tsp Baking Powder
1 tsp salt

Whisk together and set aside.


1 cup granulated sugar
1 tsp vanilla
2 large eggs (pretend there are two up there)

Measure out sugar and vanilla, take eggs out of fridge and let come to room temp.


1 stick unsalted butter (4 oz)
1/2 cup creamy peanut butter.
1 cup ground peanuts

Measure and let butter come to room temp.


The peanuts should be ground until they resemble graham cracker crumbs.
Definitely smaller than in chunky peanut butter.


Mix butter and peanut butter with a paddle until creamy.


Add sugar and mix some more.


Add vanilla and eggs, mix until fluffy.


Add dry ingredients and mix until almost combined.

When I was writing up the recipe I only intended to use one egg.
The dough was a little too sandy for me, so I added another.


Add ground peanuts.
Mix it up!

You may have noticed something a little funny about my paddle up there.

It has a little silicone edge all the way around.

Know what it does?

NO SCRAPING!


I know my dough is perfectly mixed when it comes together and I 
can see down into the bottom of the bowl!


Divide into two disks, cover with plastic wrap and refrigerate.

Roll to 1/4 inch thickness, cut out into shapes and bake 8-11 minutes.

They were the teeniest bit brown around the edges, still soft.

Cool on trays!


Look how lucky Mr. Man is!!!

Lucky peanut buttery shamrock sugar cookies just for him!!!


Whenever I ask him if he needs anything, he just says 'to get lucky'.....

this is what he meant...right?
(wink-wink)


I haven't iced them yet.
(Not sure if the extra oil from the peanuts would make the icing splotchy.
I'll keep you posted if I can ice them before they are all gone!)

I'm thinking they would be divine with a drizzle of chocolate....


I hope you'll try my very first-ever recipe!!!

Let me know what you think!


Thanks for stopping by,

Lizy B
Related Posts Plugin for WordPress, Blogger...