Showing posts with label sanding sugar. Show all posts

Tuesday, December 16, 2014

Easy Swirl Sparkle Cookie Tutorial


Remember those cookies that Jack put his name on?

The swirly sparkly ones?


Here's how I made them, and how your munchkin can help you!


Start with a plain cookie.
These have been flooded with white royal icing and dried overnight.
Although I've never tried it, 
I'm sure this would work the same on fondant, or even a plain cookie!


Cover your work area with parchment or wax paper and gather your supplies.
You'll need cookies, sanding sugar in the color of your choice, and matching royal icing.

I used red 20-second icing (a line drawn through a bowl of this icing with a knife will disappear in 20 seconds), in a piping bag with a #4 tip.

But...the consistency isn't crucial.  
Something between piping and flood is great.
Wilton even sells pre-made cookie icing in a squeeze bottle that would be good for this project.

The tip isn't very important either.  
The icing could be in a disposable piping bag, or even a ziploc.
Just snip about an 1/4 of an inch off of a corner and you're ready to go!


Start from the outside edge and pipe a shrinking spiral, ending in the middle.


The first revolution should follow the outside edge until it almost meets the beginning.

Here's the kids' part!

Dump sugar over the whole thing!


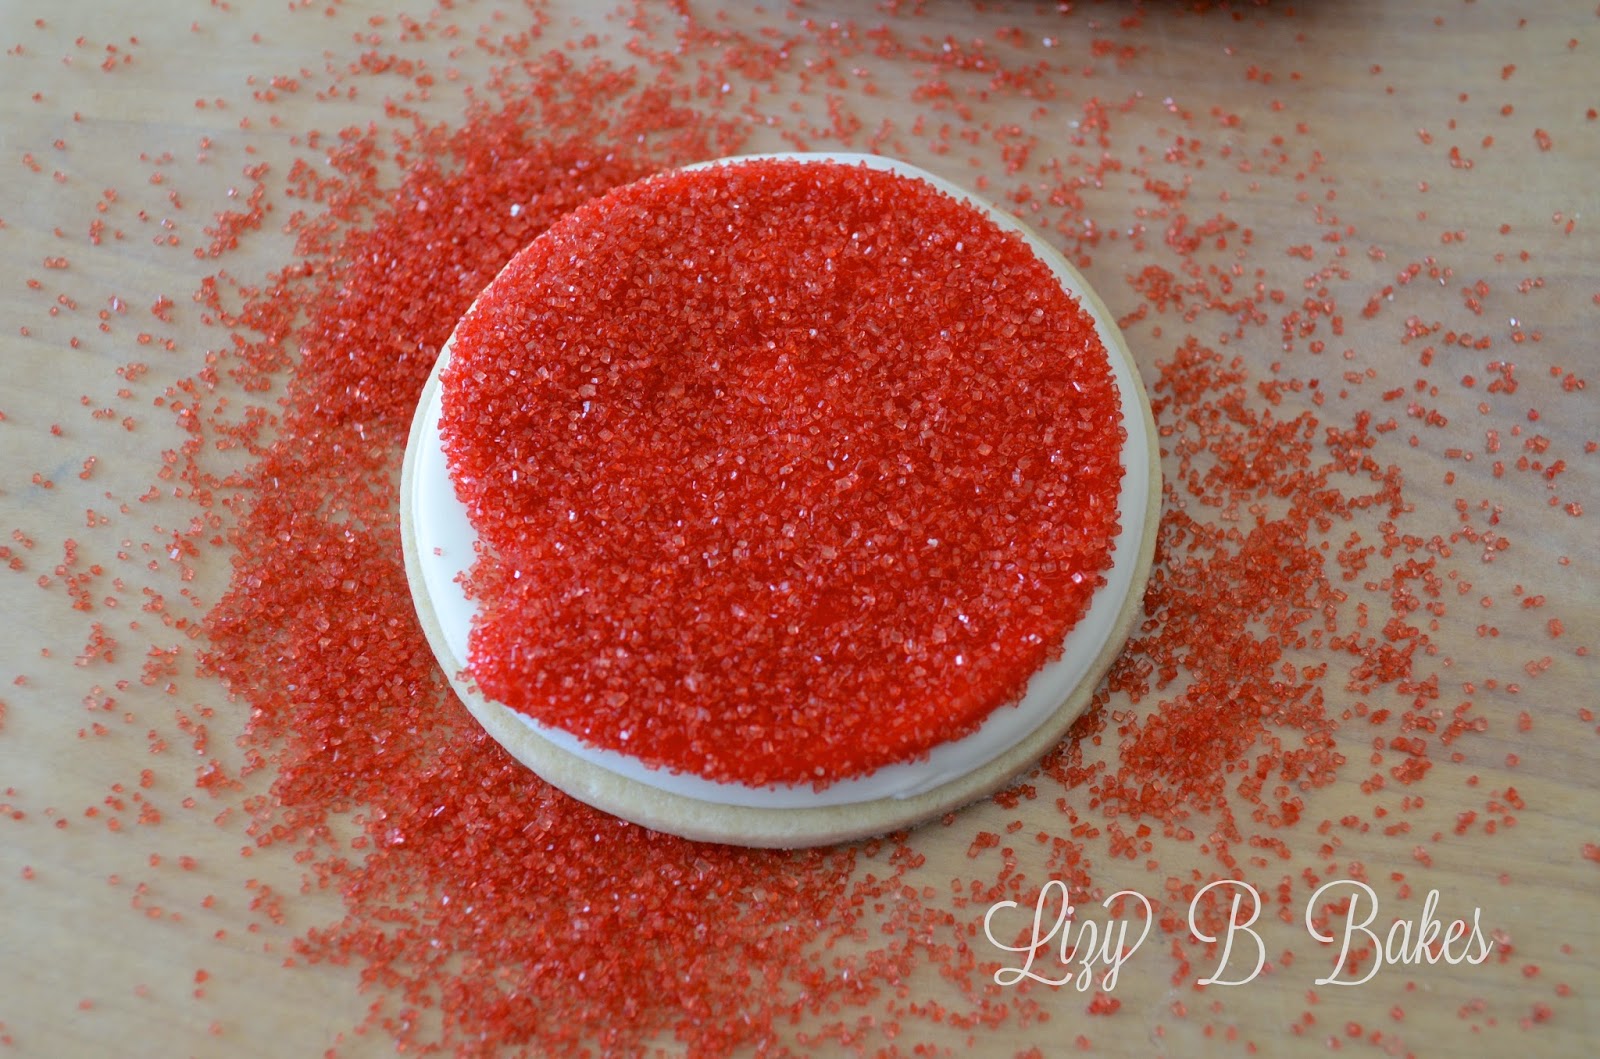
Not sure you covered it all?

Dump a little more on!


Carefully pick up the cookie and knock excess sugar back into the sugar bowl.


You did it!
Hopefully you and the munchkin did it together!!!


Something about seeing all those sparkles stuck exactly where they should be 
is a HUGE feeling of accomplishment.

Not to mention the thrill of dumping sugar all over anything!

 Now, there will be some extra sugar on the parchment.


Which leads to the other best part.....
watching all the sugar pour back into the bowl!

Just pick up and pour!


And start the whole process again!


These are simple and quick, but also charming and sweet.
Perfect for kids with short little attention spans 
who might not be able to handle a piping bag yet.


I've had a couple of questions about the font on this 'Merry Christmas' plaque as well.
It's De Flandre!


Happy Baking!

Thanks for stopping by! Lizy B
Pin It

Thursday, October 3, 2013

Easy Pumpkin Cookie Tutorial!


Let's make some pumpkin cookies!!!


After I posted the  mustache jack o'lantern cookies I had a lot of questions!

Most of them asked how I made the segments on these pumpkins.

So I made a little tutorial for you!


For these cookies I used 2 consistencies of icing: 

1. Piping icing, which is somewhat like toothpaste, stiff but stretchy 
2. 10-second flood icing.

Flood icing is regular royal icing that has water added to thin it out.
When you cut through your bowl of icing with a knife or spatula, 
the line you make will eventually disappear.
However many seconds it takes for that line to fade completely, 
is how many 'seconds' your icing is called.

Here we go!


Using piping icing and a number 2 tip, outline your cookie.


Then draw curved lines dividing your pumpkin into 5 sections.

Make sure your dividing lines touch your outline where they start and stop.


Fill alternating sections with flood icing.


Poke any big air bubbles with a toothpick and set aside to dry for a bit.

(Y'know...long enough to fold some laundry...watch a little tv....eat a huge piece of cake and take a nap...whatever floats your boat)


When the first bit has dried, fill in the rest!


Fill these enough to cover your line that divides your sections.


So...that's it really!
You could stop there and move on to the stem....or....


You can make them SPARKLY!!

If you choose to add sparkles,
let your first sections dry a bit longer-I wait a few hours.

You'll need to be able to pick up your cookie and handle it without crushing your icing.


I used orange sanding sugar, but white would be pretty too.

Place your cookie on a paper plate or paper towel.  You'll want 
something to catch the extra sugar and help get it back into your bowl when you're done.


Fill your empty sections with icing and wait about a minute or so.


Grab a spoon, fill it with sugar, and sprinkle over the wet icing.


Or....dump it on, pour it on....whatever.


Just cover all the wet parts.


Carefully pick up your cookie and let the extra sugar fall onto the plate.


Sparkles!!!


Now we just need a stem!

Pipe the outline with a number 2 and fill with flood icing.
Use whatever color you'd like....black, brown, green...


Leaves are made with piping icing and a number 68 leaf tip.


For large pumpkins like these I like 3 leaves.


First one side,


Then the other.


Middle leaf last so that it lies on top.

Let 'em dry 8 hours or overnight.


That's it!!!!


You can do it!

I know you can!


You don't have to stick with orange either....


It's Halloween!

Go Crazy!!


Here are some other pumpkin and fall tutorials to have fun with!!


Thanks for stopping by! Lizy B
Pin It

Tuesday, February 12, 2013

Take A Peek Tuesday! Which Came First....?


A reader posted a question on those Chevron Heart Cookies from a few days ago.

K asked "Do you sugar first and then go back for the second color, or the other way around?

When she posted, she chose Anonymous and was a 'no-reply' commenter,
so I couldn't answer!!!

But I can answer her here!
Whew...


I always, always, always decorate the section to be sugared, last.


Here's why:


See that baseball diamond cookie on the left?
Notice where the brown 'dirt' meets the sugared 'grass'?

That's what happens (at least to me) when I sugar first, then flood the area next to it.
The wet flood icing sort of grabs onto the little sugar crystals and the edge isn't quite straight.


The sparkly centers on these cookies were done after the outer section had dried,
much cleaner edge.


Hope that answered your question K!
Thanks for asking!


Thanks for stopping by! Lizy B
Pin It
Related Posts Plugin for WordPress, Blogger...