Showing posts with label hibiscus cookies. Show all posts

Monday, May 19, 2014

Hibiscus Cookie Tutorial!


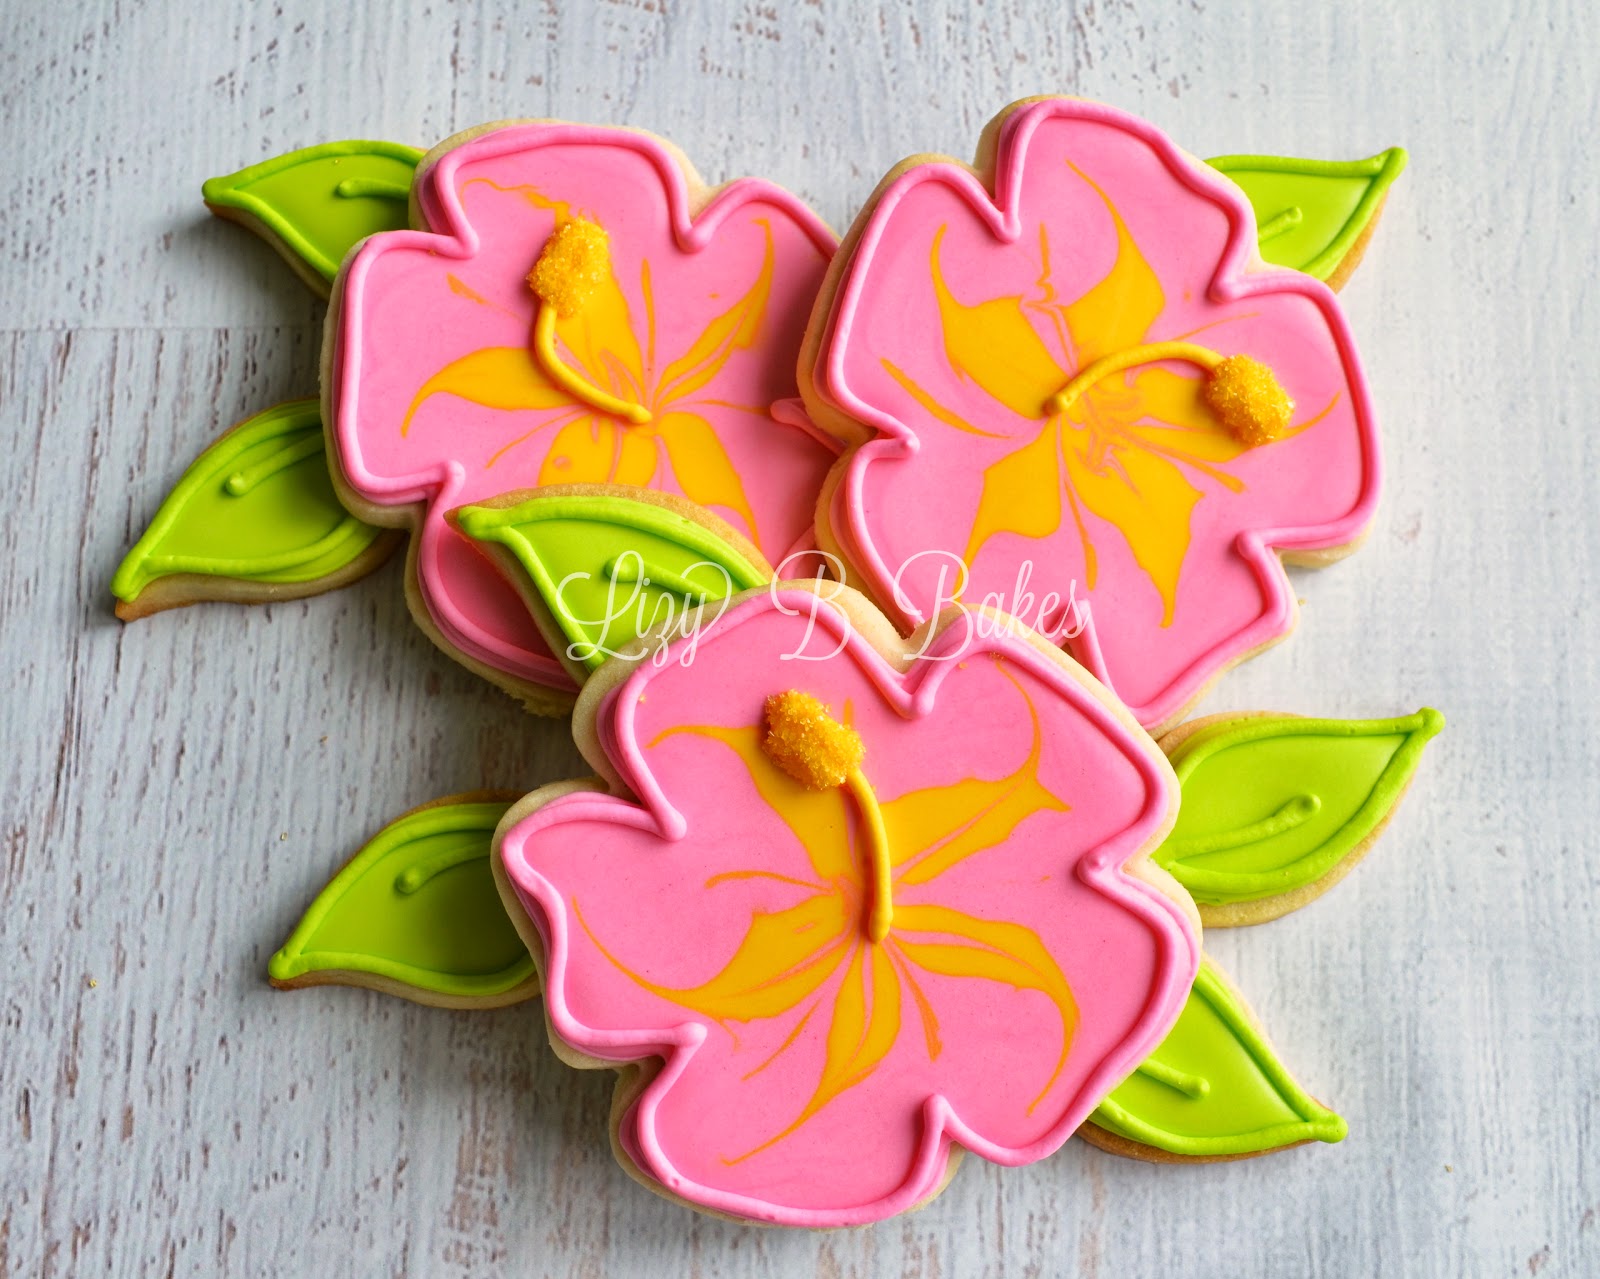
I love making flower cookies.


Love, love, love, love....


Especially these tropical hibiscus flowers.


Wanna make some of your own?


Okay!!


Bake flower cookies using a 5 petal flower cutter, but add a leaf shape before baking.
(My favorite flower cutter is actually a sand dollar cutter, but I won't tell anyone if you don't)


When you cut the bottom of the leaf shape out of the flower so that you can fit it into place, 
the outline of the flower is removed.  

Before I bake it, I press the edge of the cookie cutter into the leaf so that I can see the outline again.


Outline your cookie with a #3 tip and piping consistency icing.


Outline your leaf.
Let these dry.


For the inside of your flower you'll use two colors of 10-second flood icing.
I like using one color for the petals and white or yellow for the center.


Starting with your petal color, flood most of your cookie. 

Leave a space about the size of a quarter in the center for your contrasting color.
Try to make the shape somewhat irregular-it doesn't need to be round.


Then quickly fill in the middle.

Now, grab a toothpick, boo-boo stick or stylus...but work quickly!


Put the tip of your tool in the center of your cookie and drag it outward toward the middle of a petal.
Make the line a little bit curved if you can.

Wipe off your tool when you lift it out of the icing.


Do this for each of your five petals.


This time you will start at the outer edge of your flower.

Place your tool into the icing at the point between your petals and draw a line inward, 
ending at the center of your flower.


Repeat that five times all the way around.


That's it!

(If you have any air bubbles left, take care of those now.
Like that huge one up there on the bottom petal!)


Set that cookie aside to dry and start on your next one!

(you can take a minute or two to admire your cookie-I'm sure its gorgeous!!)


When its dry, flood your leaf and outline your flower with your piping icing.


Now, the stamen is super easy, you just have to remember to do it in two steps.


First the bottom part.....


Pipe a curved line, a little longer than half the length of the stamen, 
with yellow piping icing and a #3 tip.


Let it dry!!!


Pipe the end of the stamen with the same icing and tip.
I make a bit of an arrow shape, but a curved rectangle is fine too.

Immediately cover this with sanding sugar.
By letting the bottom dry first, the sugar doesn't stick.

That gives the stamen a lovely 'pollen just on the end' look.


I hope you'll make some of your own!!!


More Flower Cookies!

Surfboards and Flowers!

Tropical Flower Cookies!

Ribbon Rose Cookies!

Baseball Flower Cookies!

Sunflower Cookie Tutorial!

Flower Cookie Pops!


Thanks for stopping by! Lizy B
Pin It

Friday, August 9, 2013

Surfboard Cookies!


Confession time....


I have never been on a surfboard.

I've lived in Southern California since the age of 7.
A good portion of those years were spent in a town that actually had the word 'beach' in it.


I don't think I've ever lived more than 20 minutes from the ocean....even during college.


Oh wait!

There was the year and a half that Joe and I lived in Texas right after we were married.

We were completely landlocked....
and I developed a strange obsession with lighthouses.

Seriously.

I bought lighthouse ornaments, plates, pictures, placemats, puzzles....very strange.


But then we moved home and the lighthouses were packed away.

But I still haven't been on a surfboard.


And I'm pretty okay with that.

The Pacific Ocean is cold!

I'm more of a 
'watch the waves while sipping a coconutty cocktail'
kind of a girl.


I'm also a sucker for a good beach movie...


A little love....some moonlight....a song or two.

Fabulous!!!!

Disney's new movie didn't have Elvis, but it was still pretty cute!


If you'd like to see how all these surfboards and flowers were turned into a super cute 
Disney Teen Beach Movie stop by Pink Peppermint Prints!

Click HERE

She even has great printables!!!


Our family will be leaving for an island vacation soon.

Maybe I'll finally get on a surfboard!


Okay, fine....we all know that won't happen.

I'll be the lady with the big ole sun hat, sitting in a lounge chair next to the pool, 
holding a fruity drink with an umbrella.


But I'll also have a fabulous view of the ocean!!!!


Here are some more fun beachy cookies!

Surfboards and Waves
Beachy Birthday Cookies
Bikini Cookies
Tropical Flower Cookies

Thanks for stopping by! Lizy B
Pin It

Tuesday, July 23, 2013

Tropical Flower Cookies!


I have Hawaii on the brain lately.

Tropical drinks, suntan lotion, gorgeous sunsets.....

so I made some tropical flowers to go with my daydreams!


When readers ask me how to start decorating cookies,

or what shape to start with,

I usually suggest these wet-on-wet Hibiscus flowers.


They only require two colors, come together super quickly,

and because there isn't really a 'right way' to do them,

a beginner can get really great results!


The basic instructions are the same as the wet-on-wet tutorial I posted for Fall Leaf Cookies.

(You can see that HERE)

Except, I used a sand dollar cookie cutter, not a leaf.
That would have been weird.

You can find that cutter here...

Sand Dollar Cookie Cutter

The leaves....


are from the Wilton Set of 3 Leaf Cut Outs.

My all-time, favoritist, can't-live-without-them, leaf cutters!

You can find them here

Wilton Set of 3 Leaf Cut Outs
You can also find them just about anywhere that has a Wilton Cake Decorating aisle
(Michaels, Jo-Ann's, Wal-Mart, Hobby Lobby etc.)


Happy Daydreams everybody!
Now if I could only find a hammock.....


Thanks for stopping by! Lizy B
Pin It
Related Posts Plugin for WordPress, Blogger...