Showing posts with label spring. Show all posts

Friday, June 1, 2012

Cookies for the Team Mom!

If your kids have ever played a team sport,

you know there is only one job harder than being the coach.


That's being the Team Parent.


Some seasons....its even harder.

Jack's team had the BEST Team Mom Ever!!!


Yup, its true.

You know how I know this?


Because it's on the cookie.

And everyone knows.....


...cookies don't lie.


Thanks again Deana!!

You were awesome!


Of course, you'd love to do this again next year....right?


Thanks for stopping by,

Lizy B

Tuesday, May 29, 2012

Baseball Player Cookies!

Jack has officially finished his first season of Little League!


Although all the kids are sad there won't be any more games or practices until next year,

there's still one more event to look forward to.....


Would you like to meet our team?


You would?

(I knew it, you guys are just the best)


I would like to introduce the 

LFLL 2012 Colorado Rockies
Teeball Division!


#1 Max!!  #2 Lydo!!  #3 Ryan!!  

#4 Carter!!  #5 Bryce!!  #6 Flynn!!


#7 Kyle!  #8 Philip!!  #9 Christopher!!

#10 Joseph!!  #11 Nathaniel!!  #13 Jack!!


My husband was their fearless leader.

By the end of the season they were catching balls, 
making outs and even running the right direction around the bases!!

(that's not always easy...especially for the lefties!)


 Sorry....had to.

There's just nothing cuter than a munchkin in catcher's gear.....


I made something extra special for the Team Mom....

but I can't show you yet!

The party isn't until tomorrow!


Thanks for stopping by,

Lizy B


Sunday, May 20, 2012

Sunflower Cookies! A Perfect Petal Tutorial!

Summer's coming!!


We've finally had some sunny mornings here in Southern California.
I made these sunflowers a few weeks ago when we were still covered in a haze of fog.

In other words...yes, the pictures are a bit dark and bluish.
(Photo editing can only do so much.)

But, now that I've ordered a light box 
we're assured sunny weather from now 'til eternity,
so that will be good.


I thought I'd use these sunflowers 
to show you how I get the blank spaces between the petals.


Sometimes, I like a little bit of cookie to show through all that icing.

For the longest time, I just piped my petals and hoped for the best.
But every third or forth cookie I'd get a few wonky petals 
and have to scrape them off and start over.

In the interest of efficiency, 
(and not losing my mind)
I came up with a way to make sure I only had to decorate each cookie once.

Here goes....


Start with a symmetrical flower, as many petals as you'd like.


Decide how large you'd like the center of your flower to be,
 and grab a circle cutter the same size.

Being careful to center the cutter, press down gently to create an imprint.


With an edible ink marker, 
make a dot on the inside on the circle,
 directly across from the point where two petals meet.

Make sure the mark is on the inside of the circle so that it is covered when the center is flooded.

Keep going all the way around.


Next, pipe a line (I used a #3 tip) the same color as your flower center,
over the imprint, covering it completely.


Finally, when you pipe your petals (#3 tip again), 
start and stop on either side of the marks that you made.

Easy-peasy!


Perfectly spaced petals!

I finished these up by flooding the petals and letting them dry.

Then flooding the center with black, and immediately adding wet-on-wet white polka dots.


The bead trim was the last step, added after everything was completely set.

I don't like lonely flowers so I made them some little friendly bees.


This little 'side-view' bee is a new cutter for me.
Not quite sure how I feel about him yet.

I think I'd like him better if I cut off the stinger before I bake him next time.

Just too aggressive...

I couldn't bring myself to ice it on.


These flew out the door to some very lovely ladies!

Bzzzzzzzzz......


Thanks for stopping by,

Lizy B

Saturday, May 12, 2012

Moms Are Great!

I'd like to wish everyone a Happy Mother's Day!


Not only the moms,


but grandmothers, aunts, great aunts and step-moms too.


I'm sure there are more than one or two dads out there 

that are both mom and dad to their munchkins.


They deserve an extra big hug tomorrow as well,

don't you think?


I hope you all get to spend the day with people you love,

 doing something that makes you smile!


Thanks for stopping by,

Lizy B


Wednesday, May 9, 2012

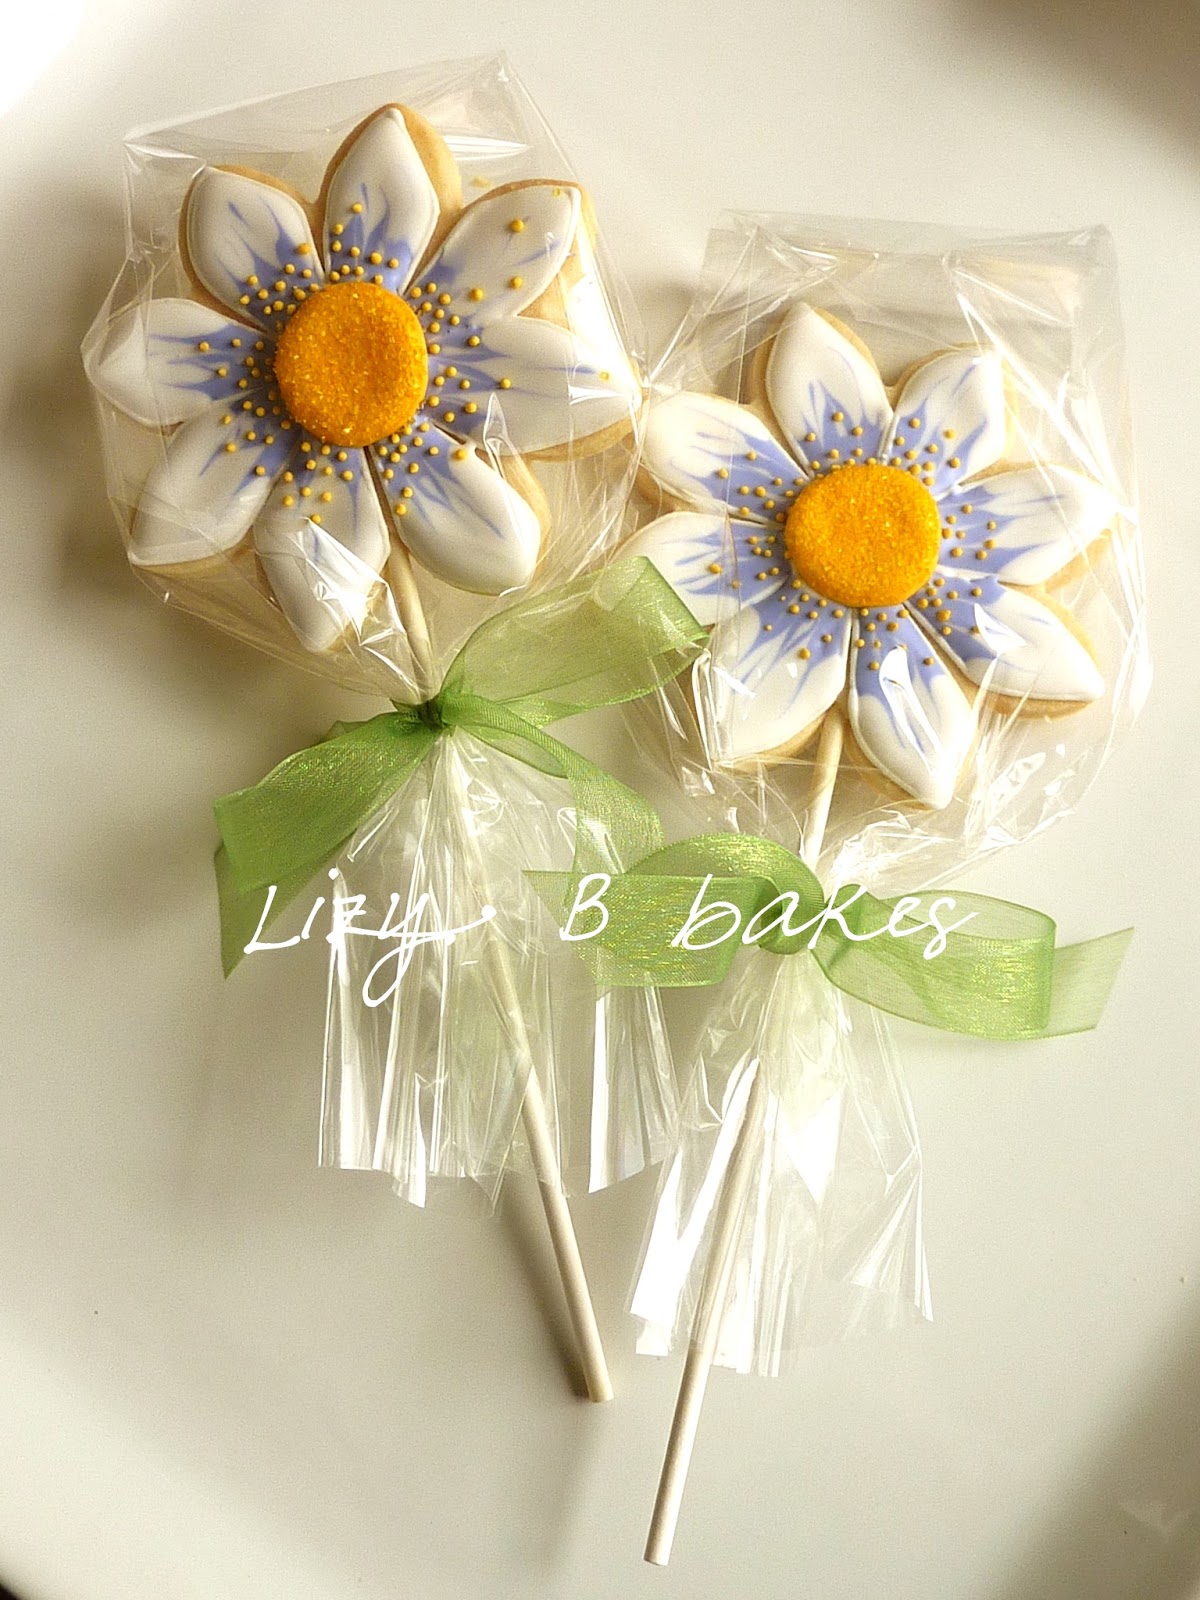
Flower Cookie Pops!

I can't think of a single lady who doesn't like flowers!


Teachers love them for teacher appreciation gifts.

Moms and Grandmothers love them for Mother's Day.

Little Ladies love them for birthdays, especially when they turn Sweet Sixteen!


The only thing better than flowers.....


Cookie flowers....on lollipop sticks!!!


You don't have to put these flowers in water....

but they are delicious with a cup of tea!


Thanks for stopping by,

Lizy B

Sunday, May 6, 2012

Mother's Day Cookies!

Mother's Day is almost here!!!


Ethan asked me the other day how Mother's Day got started.


I realized....I have no clue!


Super glad there is a Mother's Day though!

In our house, it's also known as 'Breakfast in Bed Day'.


I've always wanted to try this filigree design and I think this is the perfect occasion!

I watched SweetAmbs video tutorial about a dozen times and then.....just went for it!

She has absolutely the best video tutorials!

You can find more of them HERE!

I've already learned so much from her and I can't wait to learn more!


She makes it look sooooooo easy.

Which helped me to be brave enough to try it myself.


Here's the Instagram pic I took and posted of the process!

(I'm a little addicted to the instagram thing!  
I'm at lizybbakes if you'd like to follow along!)


I hope the lucky Moms who get these know how much they are loved!!!


There's a whole big batch of them headed to 

They'd be so very pretty with a big bunch of yellow roses,

or tulips, 

.....Oh!  Daffodils!!!!


Thanks for stopping by,

Lizy B

Tuesday, April 17, 2012

Sweet Baby Cookies

Who in the world ever came up

with the ridiculous idea that 

storks deliver babies???


I mean, c'mon......really?

Everyone knows the truth...


Babies come from the cookie garden!

Sheesh!


Thanks for stopping by,

Lizy B


Wednesday, April 11, 2012

Springtime Flower Cookies!

It's raining here today.


Not just a little either...its pouring.


So I'm trying to remind myself of sunny days...


...and gardens full of flowers.


These won't even make me sneeze!


Thanks for stopping by,

Lizy B

Thursday, April 5, 2012

Bunnies Who Love Carrots


He doesn't like to talk about it....


...but the Easter Bunny...


...has hoarding issues.


Thanks for stopping by,

Lizy B

Tuesday, April 3, 2012

DIY Easter Bunny Footprint Tutorial!

Who wants to make 

Easter Bunny footprints?!


Come on, you know you want to!


A few items of business first.

Disclaimer 1
 I did not invent bunny footprints.  
As far as my family is concerned, my fabulous girlfriend, 
Miss Christy, invented them.

Disclaimer 2

This tutorial was shot in super secret stealth mode.
That means the photos are not great....but they'll do.

Disclaimer 3

If you decide to create this little bunny trail, be aware that you 
may need to commit to this as long as your munchkins believe in the Easter Bunny.


Step 1

Gather materials.


You will need a paper plate, scissors and a pencil.

(Its a very high-tech craft.)

Normally this project takes place late Saturday night.
Joe hides the eggs, I do the feet.

Because its done at the last minute,
I have no patience whatsoever for gathering materials.

If you are in the mood to pull out your exact-o knife, 
circle cutters or punches,
go for it!


Step 2

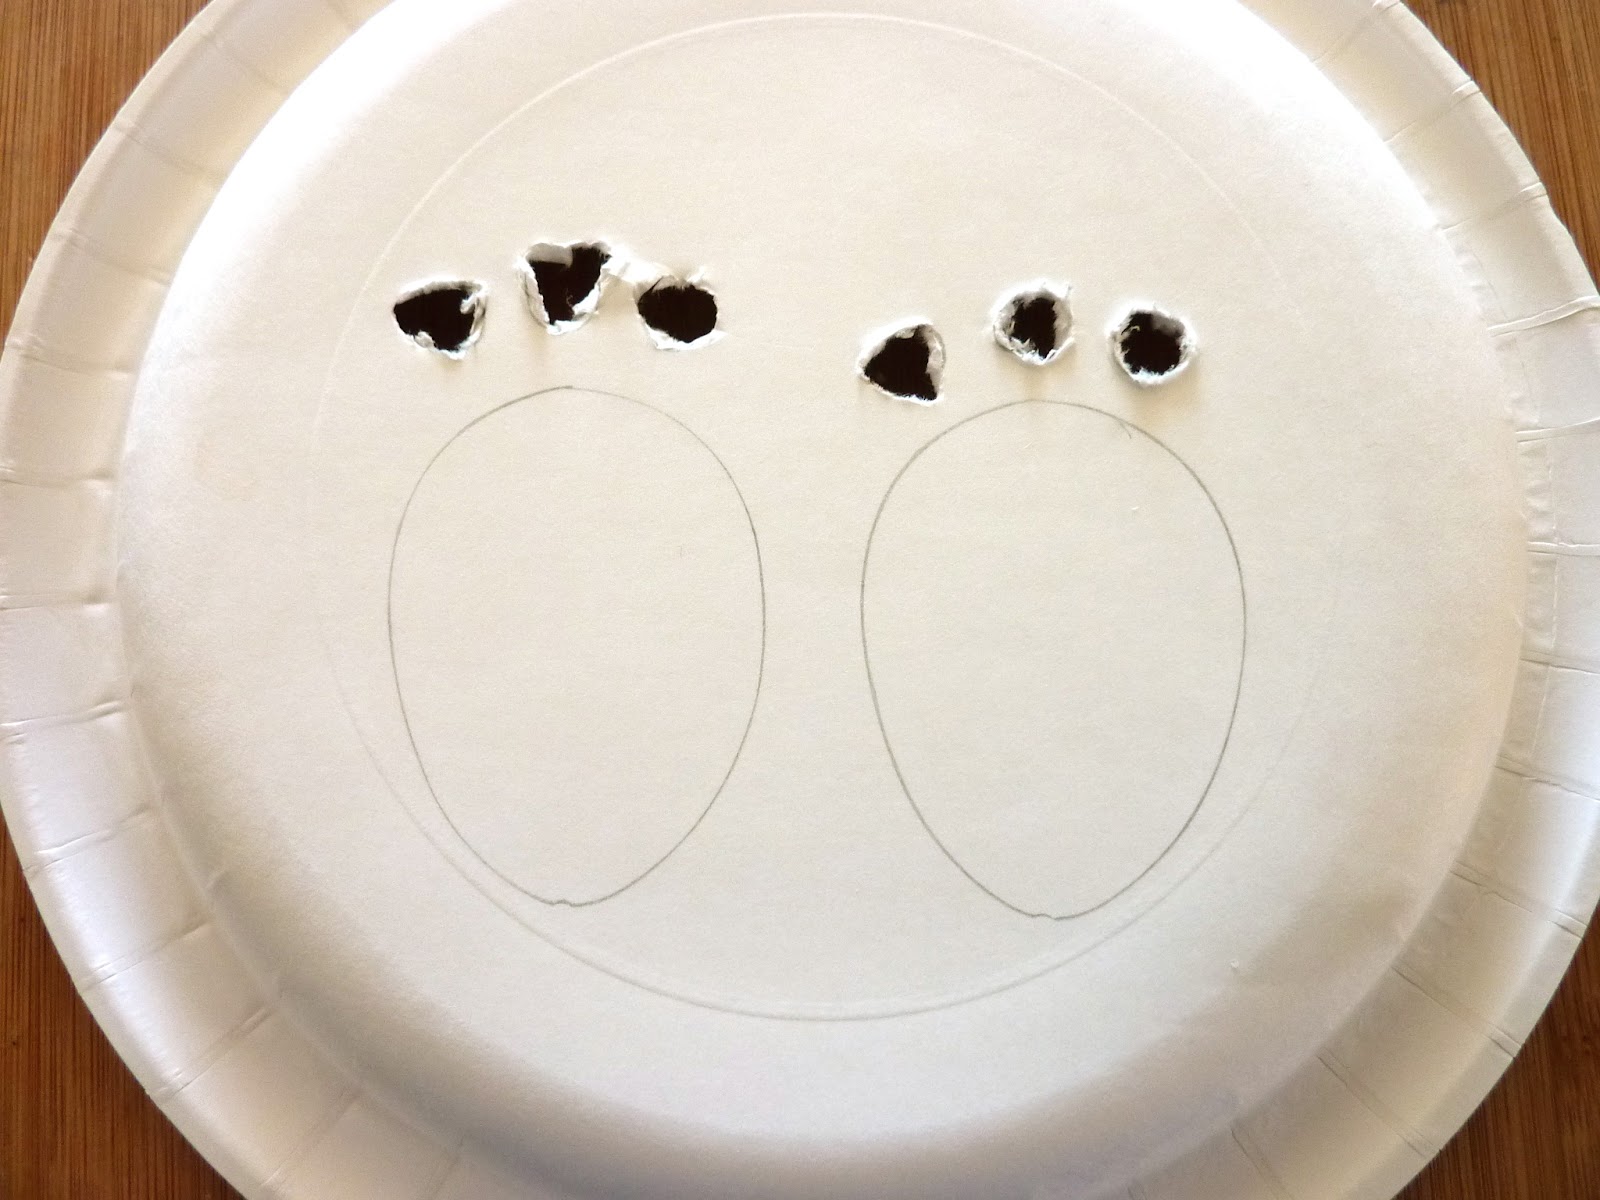
Turn your paper plate over and draw some bunny feet.


I have never-ever-EVER used a cookie cutter to draw this.

Today, it was 12 inches away on the drying rack.

I couldn't help myself.


Bunny Feet!


Anybody know how many toes bunnies have?
I have no clue.  This year I made three.

How ever many toes you give your bunny, 
just don't draw them too close together.
I makes them harder to cut out.


Step 3

Cut out the Feet!


One of the comments I received said,
"how did you get your circles so perfect?"

Um....yeah, they're not, and it really doesn't matter.

Stab the tip of your scissors into the center of a toe, twist a few times...
  
and you have a roundish hole!


*Important*

Cut out the toes before the rest of the foot.

I'm sure there is a scientific reason why the paper plate rips
more easily when you cut the big part out first.

I don't know what that is, but I do know it means you have to start over!


There they are!


Step 4

Remember all that baby powder we all bought before we
had our first baby?

And how no one ever got to actually use it because,
 even though its called BABY Powder, 
its really bad for babies?

Now you get to use it!


If you use baby powder, your prints will hang around for awhile.

I like them, so I don't mind.
They make me giggle.

If you would like more temporary prints, powdered sugar works too,
but they wash away quickly.
(especially if you forget to turn off the sprinklers Easter morning)


Step 5

Shake it up!


We have bunnies that come and visit our Salad bar lawn occasionally.

They'll perch themselves on the edge of the concrete and nibble on the grass.

I like to start there.

Set down you plate right-side-up.
(very important)


and...shake shake shake!

I used powdered sugar here because I needed to wash the feet away immediately.

Didn't want to have to explain why the bunny came early!

The rim of the paper plate 
keeps the extra sugar/baby powder from spilling all over.


BUNNY FOOTPRINTS!


Step 6

Think like a bunny!


How does the Easter Bunny come into your yard?

At our house, he crawls under the back fence and hops along the wall.

He takes a little break in the roses for a snack,
then cuts across the grass onto the cement.

Some years, if he's feeling frisky, he hops onto a slide or a tricycle seat!

Silly Bunny!

Eventually he hops over to the backdoor, leaves a basket of treats,
and then hops under the side fence to the neighbors house.


Every year Ethan and Jack can't wait to see where the bunny went.

I hope he hops over to your house next!


Thanks for stopping by,

Lizy B

Related Posts Plugin for WordPress, Blogger...