Showing posts with label boy cookies. Show all posts

Tuesday, September 24, 2013

Jungle Safari Baby Shower Cookies!

When we left off, I had a jillion sports-themed baby shower cookies ready to go...
then I heard about a little switch up in theme.

These gals found super cute decorations and plates they couldn't pass up....
animal print baby shower decorations and plates.

Huh.

I needed to incorporate jungle themed safari print cookies.


Admittedly, Katie was thrilled with all the sports cookies and didn't want me to change a thing.

But....I couldn't help myself.


They all worked pretty well together!


I had never made leopard cookies before, but I knew some really great ladies that had.

It was time to Google some tutorials!


I love Sweet Ambs video tutorials.

I watched her leopard print video a few times before tackling these.


So fun!

I love wet-on-wet designs for cookies.  


So that took care of leopard...but the plates were half zebra too.


One of the very first tutorials I ever watched was for Sugarbelle's zebra cookies.

Before that, I had no idea there were cookie ladies out there 
who showed you how to make cute cookies and wrote blogs with lots of pictures!

Way back when I made zebra print flip-flops...


But not this time!


*pssst*

Sugarbelle also has leopard tutorials,
one of which is for lingerie cookies with leopard details.

But that would have been more of a 
"Here's how you got yourself into this situation" baby shower.

Adding one more theme would have done me in.


So this little tale has a moral.

Lots of themes which seemingly don't work well together...CAN!


Just change up your colors!


Katie said the shower was lots of fun and the Mama-To-Be loved everything!

YAY!!!


I promise that's it for baby cookies for awhile....
I have a few more but I'll save them for later.

It's Halloween time!!!!


Thanks for stopping by! Lizy B
Pin It

Friday, June 28, 2013

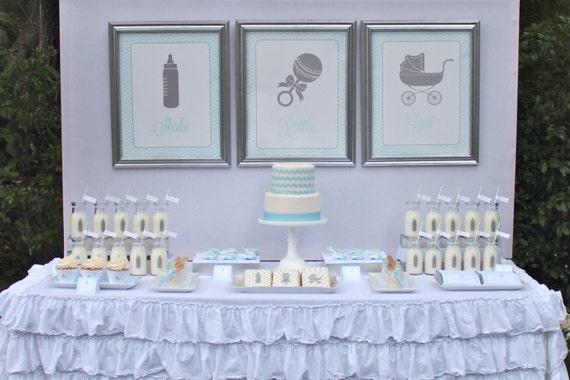
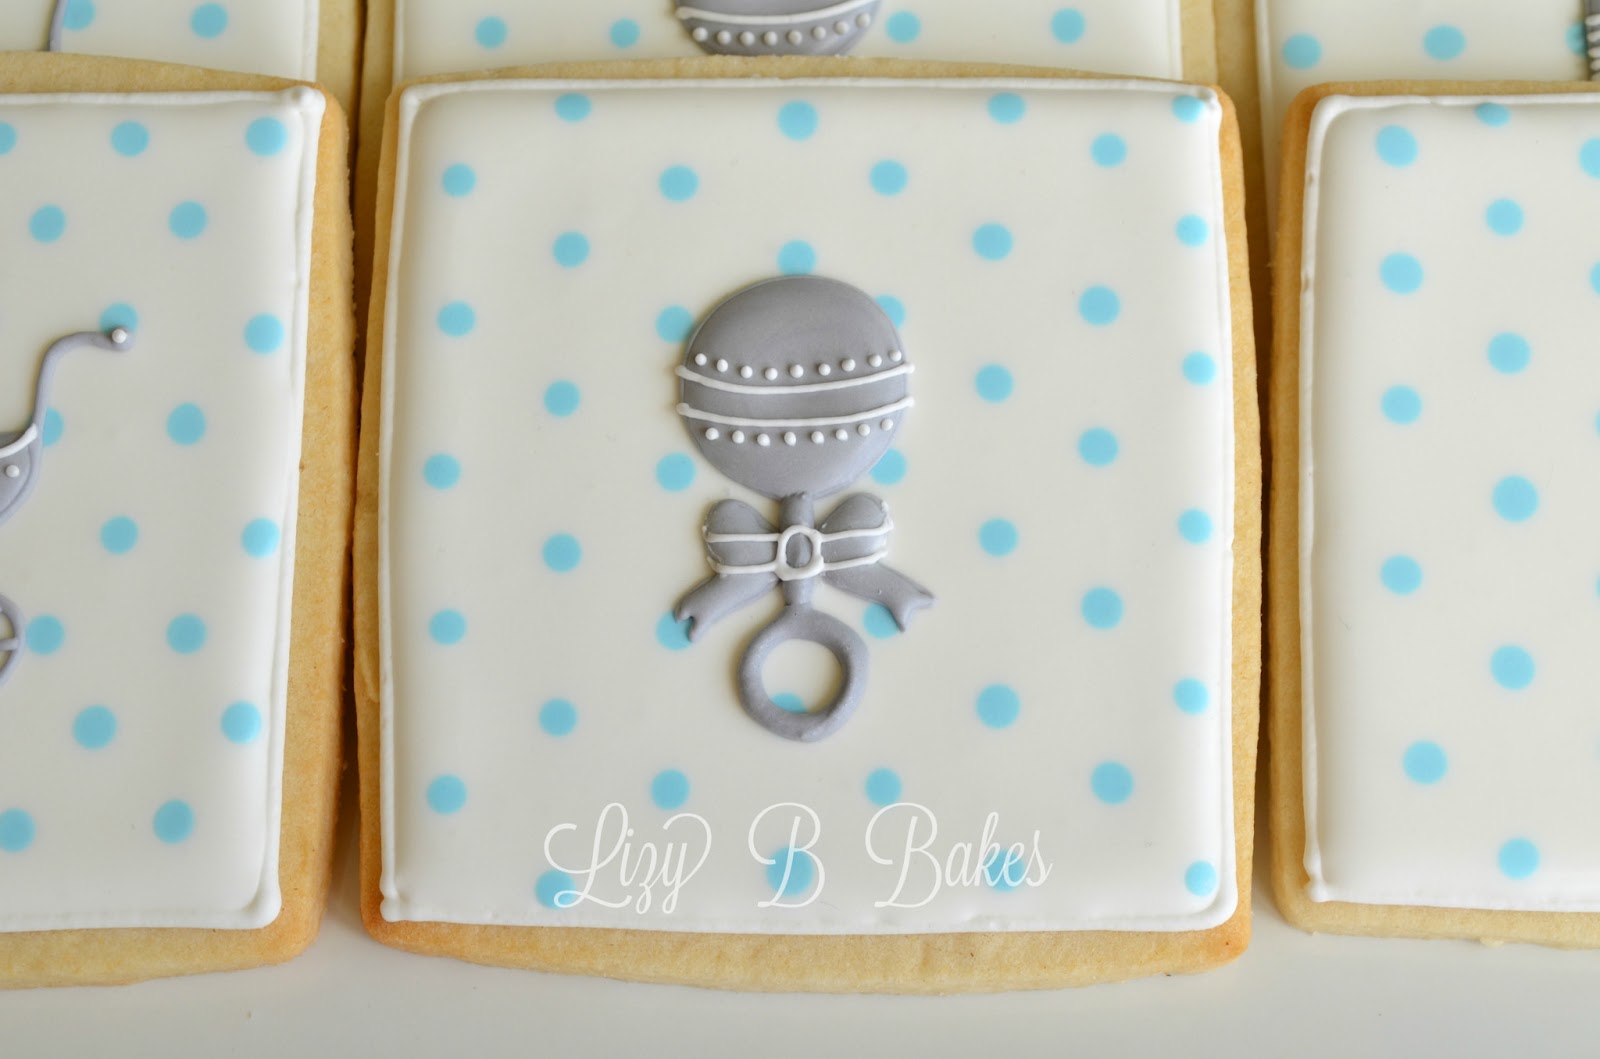
Shake, Rattle and Roll Baby Shower Cookies!


Last year I made these cookies for 
Jenny of Bloom Designs Online for her sister's baby shower.


I've made quite a few sets of these since then.


She created invitations, printables and all kinds of decor to go with the theme.

All available in her Etsy shop.


I just realized the other day that I never posted them here!

Whoops!


The whole party is so super cute it makes me want to throw a baby shower.


Not for me!  
We're all done here in our house.

All the bedrooms are full.


So....anyone preggers?


Thanks for stopping by! Lizy B
Pin It

Wednesday, March 7, 2012

Cookies for The Hunger Games!

Have you read The Hunger Games series yet?


My husband read them first, then they came to me.

 SOOOOOOO good!

They had more than enough action, which meant I only had to read a passage
or two out loud before Ethan was convinced to read them.


Then....a miracle happened.


He starting ASKING to go to bed early and read...

No, I'm not kidding.

He tore through all three books and most nights we had to 
tell him to turn off his light and go to sleep.

If you have a reluctant reader in your family you know just how shocking that is.


So in honor of The Hunger Games and the fabulous Suzanne Collins who wrote them...


I made cookies!!!

Alright so maybe that's not all that shocking.

These designs were inspired by Living Locurto's free party printables
Go download some!  They're super cute!


I did something new though....

did you notice what it was?


I painted the mockingjays with food coloring!

It was so much fun.

Miss Arty McGoo has been painting her phenomenal cookies for quite awhile.

If you haven't seen them, please go check them out.  
She's truly an artist.

After months of drooling over her photos, I finally mustered up the courage to try it myself.
Also....the Kopykake finally showed up (that helped with the courage)


A Kopykake is an art projector that shines an image downward onto a blank surface.

Before I had one, I kind of thought it would be a little like cheating.
Sort of like 'paint by number' cookies.

Um....no.  Not even close.

Its a VERY faint image and even perfectly focused, you really just get an outline.


It definitely helped make the circle an actual circle. 
All the wings and body parts ended up in the right spots and the proportions are correct.

For me, that's the hardest part, so it was a big help.


Because it was my first time painting I wasn't too confident so.....

I used this.


They're in the Wilton cake decorating section in your local craft store.
(not an endorsement, not paid for or supplied by Wilton)

I bought one (only one in a package) sheet of white.  It was 3.99 and OF COURSE I had a coupon!


I cut off a strip and painted that instead of an actual cookie.


I put dollops of color in an artist's palette and added water as needed.

I used ck golden yellow with a little americolor warm brown for the shading.


It was a little challenging to mix the colors, 
so I used a napkin to dab my brush and see how close I was getting.

Ethan helped take the action photos.


This is about halfway through.

The wings are shaded, still need to do the tail, body and 
the dreaded super straight and pointy arrow!

By now, the Kopykake wasn't any help at all.

For the shading I referred back to the book cover.


Done!

It was really fun.

Really, really fun!!!

My mom is the true artist in the family, 
but I think its pretty good for my first try.

I cut out the image and dropped it onto a freshly flooded cookie,


It was so much fun, I did another one!


This one I painted directly onto royal icing.

Much easier in black, no shading!


The movie's coming out in a few weeks...


...we finally get to see Peeta and Gale...


May The Odds Be Ever In Your Favor.


Thanks for stopping by,

Lizy B


Monday, March 5, 2012

Peanut Buttery 'Cut-Out' Sugar Cookies!


I've been keeping something from you all....

It's just that, I don't want anyone to judge....

but....

I have to be honest....finally.

My husband won't eat my sugar cookies.

(sigh)


We are....a house divided.

Some of us like sugar cookies.  
Some don't. 
(although I've heard rumors that Mr. Man has never tried one, 
I know that can't possibly be true.)

Some of us like peanut butter cookies.  
Some wish they could eat them but if she they did, 
they would have a migraine for a month and have to stay in bed under the covers.

Not good.

For many years there has been a stand-off.

If I bake sugar cookies, the husband starves.

If I bake peanut butter cookies, I can't eat any and I'm really bitter and grumpy.


I'm sure you can appreciate the traumatic nature of the situation.


So I did something I've never done before...

never, ever....


I MADE UP A RECIPE!!!!!!


I did!
Wanna see?!


Peanut Buttery Sugar Cookies
(The cut out kind!)


2 1/2 cups flour
1/2 tsp Baking Powder
1 tsp salt

Whisk together and set aside.


1 cup granulated sugar
1 tsp vanilla
2 large eggs (pretend there are two up there)

Measure out sugar and vanilla, take eggs out of fridge and let come to room temp.


1 stick unsalted butter (4 oz)
1/2 cup creamy peanut butter.
1 cup ground peanuts

Measure and let butter come to room temp.


The peanuts should be ground until they resemble graham cracker crumbs.
Definitely smaller than in chunky peanut butter.


Mix butter and peanut butter with a paddle until creamy.


Add sugar and mix some more.


Add vanilla and eggs, mix until fluffy.


Add dry ingredients and mix until almost combined.

When I was writing up the recipe I only intended to use one egg.
The dough was a little too sandy for me, so I added another.


Add ground peanuts.
Mix it up!

You may have noticed something a little funny about my paddle up there.

It has a little silicone edge all the way around.

Know what it does?

NO SCRAPING!


I know my dough is perfectly mixed when it comes together and I 
can see down into the bottom of the bowl!


Divide into two disks, cover with plastic wrap and refrigerate.

Roll to 1/4 inch thickness, cut out into shapes and bake 8-11 minutes.

They were the teeniest bit brown around the edges, still soft.

Cool on trays!


Look how lucky Mr. Man is!!!

Lucky peanut buttery shamrock sugar cookies just for him!!!


Whenever I ask him if he needs anything, he just says 'to get lucky'.....

this is what he meant...right?
(wink-wink)


I haven't iced them yet.
(Not sure if the extra oil from the peanuts would make the icing splotchy.
I'll keep you posted if I can ice them before they are all gone!)

I'm thinking they would be divine with a drizzle of chocolate....


I hope you'll try my very first-ever recipe!!!

Let me know what you think!


Thanks for stopping by,

Lizy B

Sunday, February 26, 2012

Baseball Cookies!

It's that time of year again for our family!


The Little League baseball season has officially begun!

This is an extra special year though.
After many, many seasons of watching Ethan's games,


cheering from the sidelines,


and getting to wear the 'mascot' jersey...

Jack gets to play Tee-ball.


He's pleased as punch!


So, this weekend was opening day, and of course...
there was a bake sale!

I've made baseball cookies before.

They were okay, nothing spectacular.
I needed to come up with a few new designs.


Baseball Fields!!!

These were fun...and sparkly!
(I do love sparkles!)


I used a party hat cutter that I opened wide,
then cut down the larger side into a semi-circle.


I piped, flooded and sugared the grass first, then filled in the dirt.
The baselines were added after they dried.

Jack noticed something after I bagged these up.

"Mom, where's the little line on the pitcher's circle where he puts his
toes when he throws the ball?"

Whoops.


Next came the ballplayers.

This was a great occasion to finally try some silhouettes!


I googled 'baseball silhouette clip art' to find some images that I liked.
I outlined with a PME #1 tip.
(I used my new Kopykake for the first time!!!)


All of these images has some skinny little parts.
I filled them in with thicker piping icing to try to prevent cratering,
then filled in the rest with flood icing.


I've had a few people ask about the different fonts I've used.
I love Keven & Amanda's site.  Lots of free fonts!


I like to print out the sayings I'll be using in a few different fonts and sizes.
(I leave lots of blank space on the page for 'practice space')

Then I just practice a few times.
Not much to it really.

Some of the fonts work out well.
Some...not so much.  They just end up looking messy.

But you never know until you try, 
and I'd much rather try on the paper than the cookie!


When I find one I like, I try to gauge the size and where it will fit.


I like the 'Home Run' writing and placement the best...
but I liked the silhouette the least.
Too much cratering in the middle.

So he was cut from the team....sorry man.

The other two were added to the line up and I cranked out a few dozen!


Do you like the edges!!

She made some beautiful nautical cookies that had this detail along the sides!
Click HERE to go see them!

I knew that would be perfect for baseball cookies!
It looks just like stitching!


So there's my new baseball team set!

Oh wait!


Can't play baseball with out the balls!!!

Have a great season everyone!

I'll let you know when Jack hits his first homerun!


Thanks for stopping by,

Lizy B

Related Posts Plugin for WordPress, Blogger...