Would you like some pie?


Then....do the same thing all over again.
Make some cherry shaped dots, let dry, repeat until full.


Let those dry!
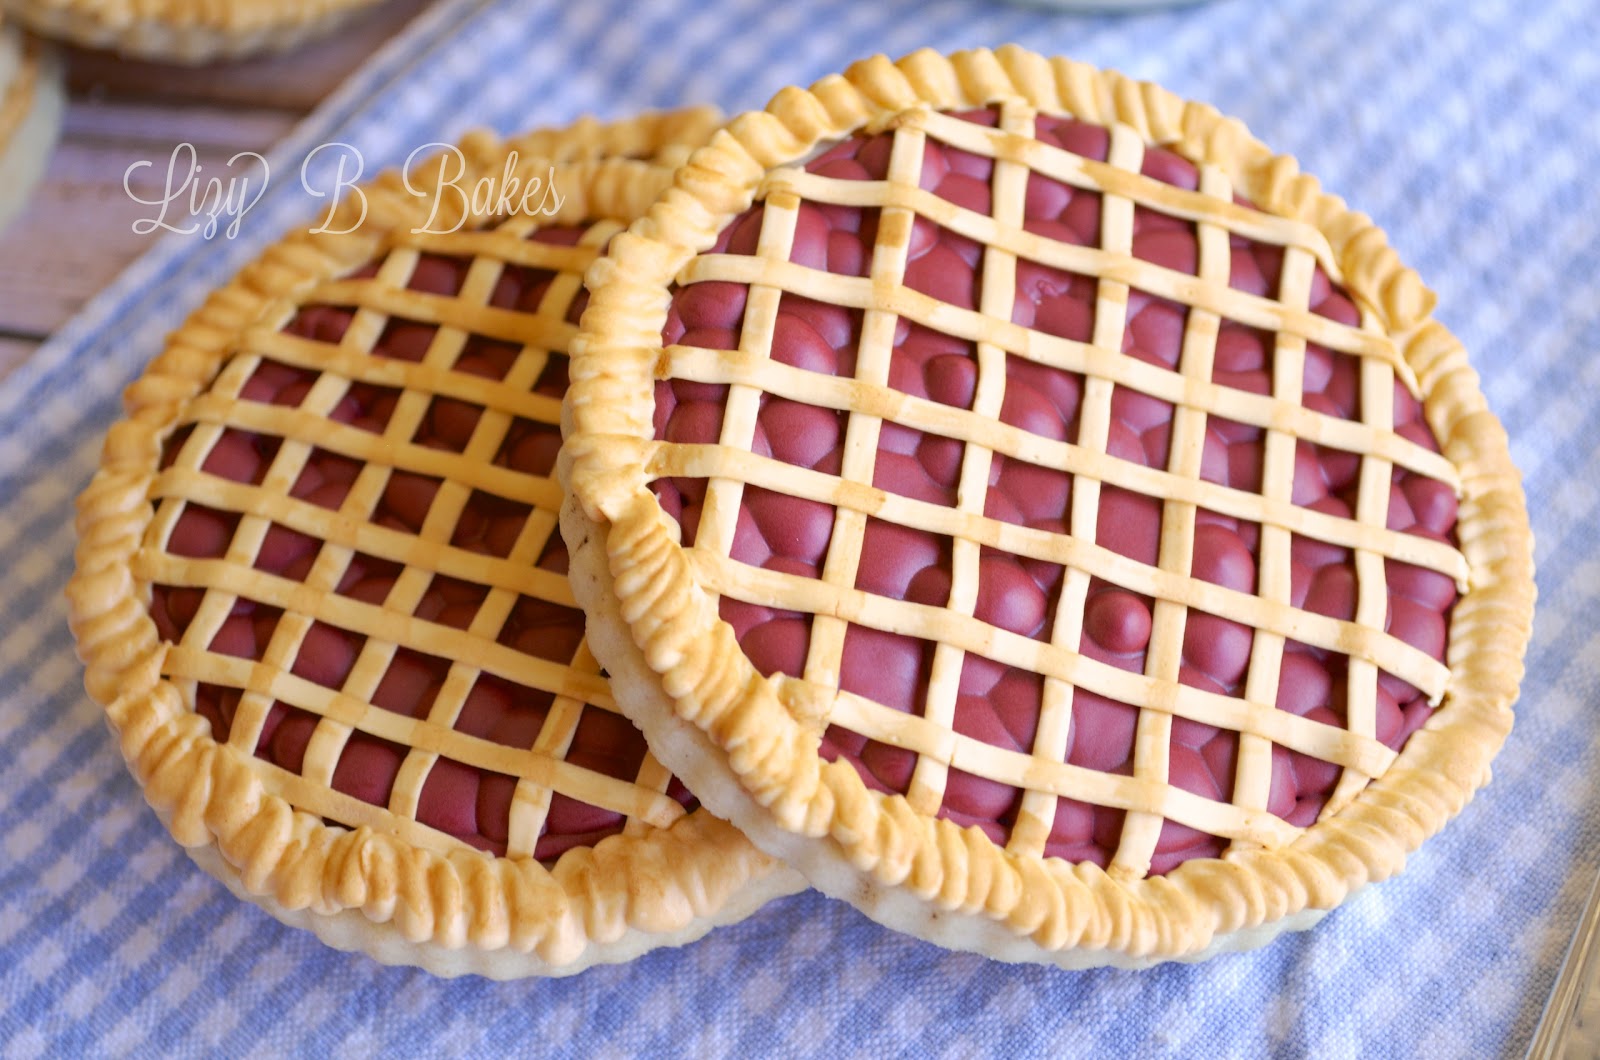
Now the Crust!!!
The top and side crust are both made with piping consistency ivory icing.

I used a 301 tip for the lattice strips.

Its a small flat tip, kind of like a basket weave without the grooves.
I've seen it called a 'calligraphy' tip, but I've never actually tried it for writing.
First one direction...

....then the other.

Easy-peasy.
I liked that the lines are all bumpy like a real pie!
Now, how you feel the edges of a pie should look really depends on your family.
Some people just fold it over on itself, others make a little ruffle.
My grandmother used a fork to crimp the edges of her pies,
so that's what I wanted to re-create.

This is a 101s petal tip.

I held the cookie in one hand and made a smooshed ruffle,
making sure that the crust met the filling.
Then set it down veeeeeeerrrrrrrry carefully.
Let it dry really well.
Overnight would be best.

Look....it's a pie!!!
But....hmmmm.
It still looks a bit....raw.
When my grandmother baked a pie it was all shiny and golden.
They never looked pale like this!
Nothing a little painting can't fix!
I can never remember if she used milk or an egg-wash,
so I used Vodka!!!!
(heh-heh)
Mix a bit of vodka (or water, or vanilla extract) with a bit of warm brown food coloring...

...and paint it on just like you would before you would bake a pie.
No need to be careful.
Just get your brush wet and brush over all the crust!

That's better!!!!

But now comes the real debate.

Do you prefer whipped cream or ice cream on your pie?

Or both?!