Thursday, March 29, 2012

Pretty Little Bunny Cookies!


I loved Mr. Bunny...really I did.

But, he looked a little lonely didn't he....


I made him a girlfriend!!

(*wink*)

She needs a name....

Becky?

Bridget?

Bree?


Oh no!

Becky, Bridget AND Bree!!!!


That Mr. Bunny sure does get around....


Want to guess what comes next?


Baby bunny cookies....in a box!


Looks like I'm going to need a few more homes for all these bunnies.....


Thanks for stopping by,

Lizy B

Wednesday, March 28, 2012

Ding-Dong! The Mailman's Here!

"Hey Jack!!!  I need your help!"

A little while ago, one of my favorite bakers 

showed us what came in her mailbox.

I loved reading it so much that I couldn't wait to do the same!


"Mom!  What'd you get?  Legos?"


"No honey, it's baking stuff"


"Oh, I thought maybe you ordered some legos for me."


"Nope, will you still help me open my package?"


"Sure!  That sounds like a great job!"


"Mom, are you sure its not a present for me?

It looks like a present in here....."


"No honey, no present."


 "These are those squeezy bottles you use, but they're baby ones!

Oh, they're so cute!"


"Arrrrrrgh!"


"Don't you already have these?"

"I know buddy...I always need more."


"What's in here?"


"MORE COOKIE CUTTERS!!!"


"Look Jack, its the Eiffel Tower in France..."

"Are you sure?  I thought it was a shooter thingy..."


"Mom I think this shoe would fit me its so BIG!"


"I like this one best....what is it?"

"It's a hot air balloon!"


"Look!  I made a store!"


"Where are you goin' buddy?"


"Can I be done taking pictures now?"

"Of course honey, go have fun, thanks for your help!"

"You're welcome mom.  But next time I hope there's legos!"


Thanks for stopping by,

Lizy B

Sunday, March 25, 2012

Royal Icing Recipe, Step-by-Step!

Lately, I've been getting a lot of emails asking about my cookie icing.


I always use Royal Icing for my cookies,

 and although there are many resources out there to help, 

I thought it was about time I put together my own post for you all!


This is the recipe I use.


Yes....I did write the recipe directly onto the top of the container I keep 
the meringue powder in, with a permanent marker.


It's one less thing I have to remember.


ROYAL ICING


6 TBSP Meringue Powder

11-12 TBSP Water (3/4 of a cup)

2-3 tsp flavoring (vanilla, almond....whatever floats your boat)

1 TBSP light corn syrup


  Just so we're clear....I did not make up this recipe, 
I have no idea who did, or I would happily give them credit.
It's very close to the Wilton recipe.

There is a recipe out there called Antonia74,  
I've never actually looked it up, but it could be the same too.


This just happens to be how I put it together!

Here we go!


CK products happens to be the meringue powder I prefer.


Wilton also sells meringue powder that is easy to find at

Michaels, JoAnn's, Wal-Mart etc.


I measure out 3/4 cup of water in a glass measuring cup.  


If the air is very dry, like 'your hair keeps flying up with static electricity' dry, 

I'll add another tablespoon of water.


If its damp or foggy or about to rain, I take away a tablespoon.

Highly scientific...I know.


I stir up the meringue powder a bit with a little bitty whisk,

then measure out 6 TBSPS and dump it into the water.


Whisk it up until its frothy and all the powder has dissolved.

Then....I wait.


I answer a few emails, read a blog or two, 
watch the housewives of who-knows-where
wash the dishes, fold the laundry.


Next, I pour a two pound bag of powdered sugar into the 
bowl of my stand mixer.

Stir it around a bit with a whisk.

If you're feeling super industrious you could sift it.

I'm not usually in that kind of mood.


By now the meringue powder has been sitting 

for about 10 minutes or so.


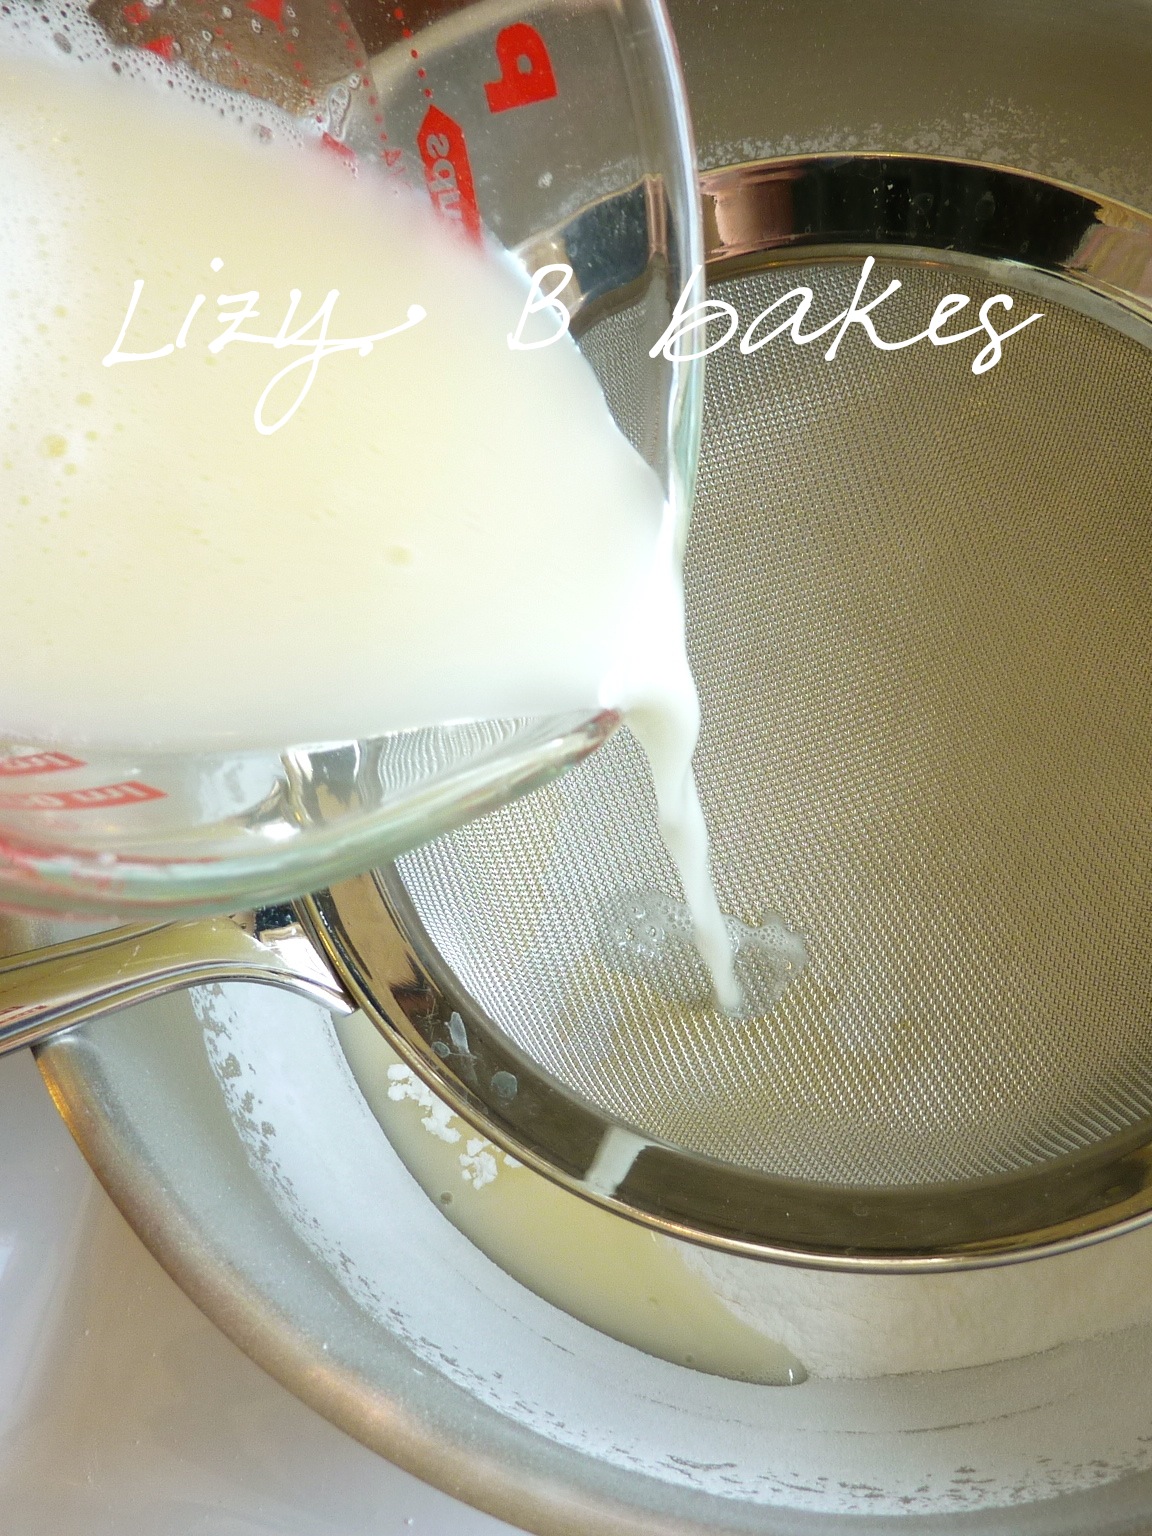
One more quick stir with the whisk and it goes through

a fine mesh strainer into the sugar.


Right before mixing I add the corn syrup and flavoring.


The corn syrup adds a little bit of shine and cuts down on the 
'tooth-breaking' hardness of the icing when its dry.

The flavoring adds......well, flavor.


That's everything!

No secret ingredients!


I do have a favorite secret tool though.

I love my beater blade.

The silicone edges mean I don't have to EVER 

scrape down the sides of the bowl


EVER!!!!!


They have no idea who I am, nor did they give me anything for saying this.

I just really love mine...


So, the only thing left is to turn on the mixer!!!


After a couple of seconds on 'stir' to make sure all the sugar is wet,
I turn it to 3 and leave it on for about 5 minutes.

In some kitchens, it takes 3 minutes, some others, as many as 10.

Mostly, I've found, its important to be patient and not turn the mixer up too high.
Your icing can become gritty and have many, many air bubbles.


Air bubbles are bad for smooth cookie icing.

Keep checking and turn it off as soon as you get a peak.


Can you see those two peaks up there?

One is pointy and sticking up, the other is pointy but flopped over.

Just how I like it!!

One reader asked me if my icing was 'creamy'.

I wasn't sure at first, but I actually think that's a pretty good description.

Creamy and smooth, but still stiff.


From here its ready to be colored, wrapped and slipped into piping bags...


...or thinned down to flooding consistency and poured into squeeze bottles.


The other big question is usually 

"How do you store your icing?"


I really like these 20 oz disposable

 (but I use them over and over) ziploc containers.


They have an air tight seal and I can fit one batch of icing

into two containers perfectly!


I love that I can use half immediately and pop the other into the fridge!


One last tip.....

This stuff dries like concrete.

Be sure to leave the beater in your mixing bowl,

give it a couple of squirts of dish soap,

 and fill in to the top with hot water.


Nothing is more miserable to clean than a bowl of rock hard icing.

Except maybe decorating tips filled with rock hard icing.

Ick.


Thanks for stopping by,

Lizy B

  PSST!......Don't forget to enter the giveaway!!!!

Giveaway closed....congrats Brooksley!

Friday, March 23, 2012

Personalized Easter Egg Cookies!

I can't seem to let a holiday go by without putting a name on something.


I could say I don't know why...but I do.

Personalized goodies were a hard to come by when I was a kid.


Every time I spotted a spinning rack of keychains or mugs or mini license plates

I made a beeline towards it and began searching...


Want to know how often I found 'Elizabeth' on those racks?


ZERO!

Okay, maybe once or twice...but not on the good stuff.


My name was never on anything cool like,

unicorn barrettes

or

rainbow necklaces

or 

scratch and sniff stickers!!!!!

(really, I'm not bitter at all)


So now, I'll pretty much put a name on anything...

These are for Kelly's little boys!


Have a great weekend everyone!

Don't forget to enter the giveaway over at Managing Marbles!

I'm giving away Easter cookies for your Easter Baskets!!!

Giveaway closed!

Congrats Brooksley!


 Thanks for stopping by,

Lizy B

Thursday, March 22, 2012

The Giveaway Has Started!


*Update 3/30/2012*
Giveaway Closed!
Congratulations Brooksley!


Here's the scoop!

I'm giving away two dozen Easter cookies!


Yes!  Mr. Supersize Bunny is included!!!

Well, not this exact one. 

 I won't say what happened to him, 

but there was  a shocking amount of crumbs on the kitchen floor this morning.

(The winner gets a freshly baked Mr. Bunny along with freshly baked spotty egg cookies) 


Here's what you need to do!

Head over to


My friend Kelly has a new blog and she's hosting the giveaway!!!


Okay, now go....seriously....

Go enter!

Mr. Bunny needs a good home.  


Thanks for stopping by,

Lizy B

Wednesday, March 21, 2012

Easter Bunny Cookies!


There's only one thing better than an Easter Bunny Cookie....


Know what that is?


A really BIG Easter Bunny Cookie!!!!


That's right!!!

He's Supersize!!


That's a 6 inch bunny!


He needs a home don't you think?

Hmmmm....

How should we get him a home?

Any ideas?


I know!


(come back tomorrow for details!)

Edit:  Here are the details!!!
Head over to Managing Marbles
for the giveaway!!!!

Winner is chosen on Thursday, March 29th!


Thanks for stopping by,

Lizy B


Monday, March 19, 2012

DIY Peeps Easter Bunny Cutter!

Who doesn't love Peeps!!!


Okay...me.  I don't like them.

Please don't hate me...just not a raw marshmallow fan.

However,  give me a s'more made with a peep and I might bite off your finger.


Maybe that's why I've never made these before.  

 I just might be the very last baker to get around to them.


Until recently, peep cutters were hard to come by.  

Now I've heard that Peeps sells them online and

Copper gifts makes a gorgeous copper peep cutter called

the 'Bunny Bun'.  They even have different sizes!


I've put them into my virtual shopping cart a few times now,

 but they always seem to be the cutters that get left behind when I see my total!!

(copper's not cheap....)


So here we are again, it's Easter time, and I still don't have the right cutter...

(*sigh*)


"NO PEEPS FOR YOU!!!!"


Well we can't have that now can we...?


Time for a little creativity....and pliers.


I found this cookie cutter set at Wal-Mart, in the Easter candy section.

Jack and I were searching for something completely different

 and this jumped off the shelf at me!


I barely had it in my hot little hand when Jack said,

"MooooooooM!  You already have a bunny cutter!"

(some children are much too observant aren't they?)


So I explained to him...


"You know, you're right Jack, I do.  Look at the ears on this bunny though.  

They look a lot like something I need and don't have.  

I think I can turn this into what I need it to be."


.....then...

...after mulling that over for about thirty seconds....


"Mom, can I get that star wars lego set with the clones in it.  

I know I already have it but I can mix up the clones and make new ones.  

I really need it so Ethan and I can have a battle and play together...."


(Little stinker...)


So here's the set that came home with us...


The ears looked just like the ears on a peep to me,

I just needed to get rid of the feet.


I flipped the cutter over 

and just worried about the shape of the edge that would do the cutting.

Its much harder to manipulate the folded/top edge!


It took about five minutes of smushing and pinching 

with a pair of needle-nosed pliers.


No more feet!!!

His cheeks are a little less pointy too.


What do you think?

(they're 4"inches tall, in case you want to make your own!)


Pretty Peepish I'd say!!!


Thanks for stopping by,

Lizy B
Related Posts Plugin for WordPress, Blogger...